


How To Tie a Fishing Knot: The Complete Guide
 How To Tie a Fishing Knot: The Complete Guide
thegearhunt.com
How To Tie a Fishing Knot: The Complete Guide
thegearhunt.com
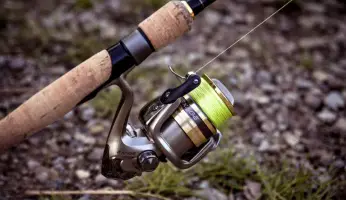
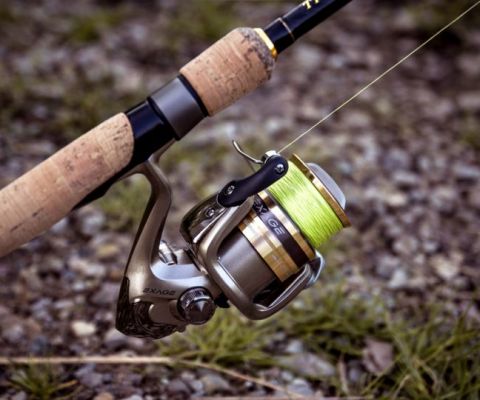
When preparing to go fishing I’m willing to bet you have done your research on the best poles, reels, bait, line, and even electronics to improve your fishing experience. Although all of these things contribute to your fishing success, one important aspect that gets overlooked is the knot you choose to tie your hook or other tackle on with. Your knot is in fact one of the most important things about fishing.
Being able to choose the right type of knot for the right line and situation can be tricky. There is nothing worse than the moment you get into a fight with your fish, then suddenly it’s gone. You reel up only to realize that not only is your fish gone, but so is your expensive lure that you just purchased for this trip. The most reasonable explanation for this, more than likely your knot wasn’t strong enough to hold your prize
This guide will walk you through how to tie the most commonly used knots. The knots in this guide are knots that have been used for years by professional anglers. We will go over each knot clearly, so that by the end of this guide you will know exactly how to tie each knot correctly.
Choosing the correct knot will depend on what you plan to tie onto your line. There are knots that are specifically designed for tethering together two sections of line. As well as which types of line you may want to tie together. Some knots are definitely stronger than others, you may want to choose your type of knot by considering the type of fish you are going for.
Types of Fishing Knots and Their Uses
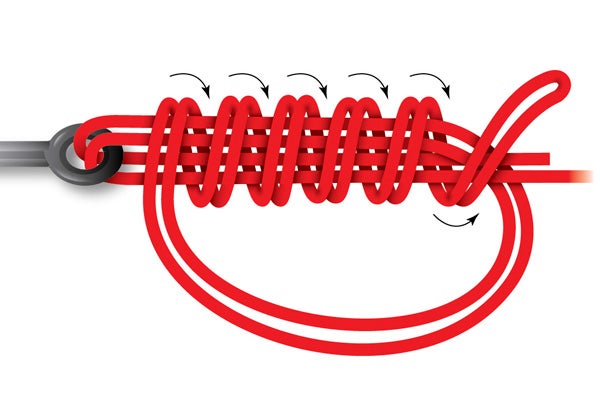
Trilene Knot
The Trilene Knot is a trusted knot for connecting a swivel, hook, or lure to your fishing line. This knot has been rated to hold at least 90% of your lines integrity. The Trilene Knot creates a double wrap of your line, through the eyelet of the object, giving you an added measure of security.
Step by Step Instructions for Tying the Trilene Knot
- Start by putting the end of your line through the eyelet of your hook, lure or swivel. You will need to do this twice to create a loop behind the eyelet.
- Now you will want to take the end you put through the eye, and make five to six wraps around your standing line.
- Feed the end of the line into the two loops you have created. Don’t pull the knot tight just yet.
- Before securing the knot in place, be sure to wet your line. This will prevent any strain to your fishing line.
- Lastly, you will want to clip the extra line off the knot. Meaning the piece you put through the the eyelet and loops.
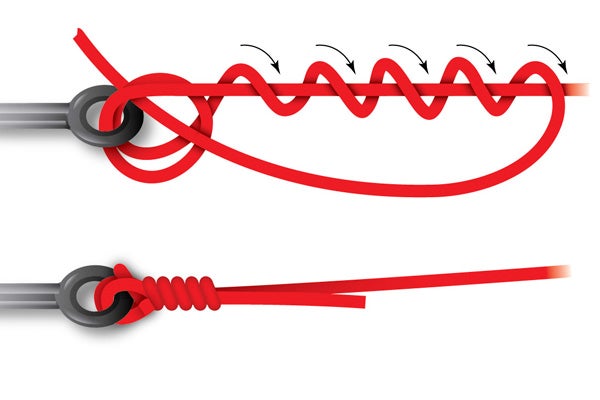
Improved Clinched Knot
This type of knot is arguably the simplest, most popular fishing knots used to tie a hook to the fishing line. This knot is reliable but we do not recommend for fishing line over 25 pounds or for braided line.
Step by Step Instructions to tie an Improved Clinch Knot
- Pass your line through the hook loop. Be sure to pull enough line through, as you will need to wrap the loose end around the original line 5-6 times.
- Pull the lines ends through the loop closest to the eye of your hook. While doing this you should have created a larger sized loop. Now thread the end of your line through that loop as well.
- After wetting your line, pull both ends of the line with even pressure, this will tighten the coils you have made. After the coils have been tightened be sure to cut any loose tine from the knot.
Palomar Knot
When tied properly, the Palomar Knot is designed to be the strongest knot, making this knot compatible with braided fishing line. When you tie this knot, you need to be sure that all elements of the knot have cinched tightly. Failing to do so, will result in a less secure knot.
Step by Step Instructions for Tying the Palomar Knot
- You will start out by doubling 6 inches of line, after doing so, pass the end of the loop into the eye portion of the hook. If your having trouble putting the end of the loop through the eye of the hook there is an alternate method.
- Alternate Method: Start by feeding the end of your line into the eye portion of the hook. Now double back and put the line into the eye portion of the hook again. Be sure to leave at least six inches of looped line free.
- Next you will need to tie a loose overhand knot, be sure to leave the hook hanging at the bottom of the knot.
- This next step can be tricky, hold your overhand knot in place between your thumb and forefinger. Using your free hand, slide the loop over the hook, making sure that the loop is above the eye of the hook.
- Pull on both the loose and standing line simultaneously, this will secure your knot. Before using the hook, be sure to check that all elements of your knot have been cinched. If they are not all cinched, your knot could fail.
Recommended Items
- Power Pro Spectra Fiber
-
Our rating - 0.005inch - 0.035inch
- Price: See Here

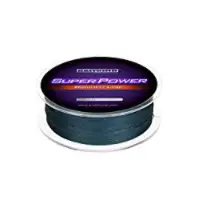
- KastKing SuperPower Braided
-
Our rating - Special Proprietary Treatment
- Price: See Here
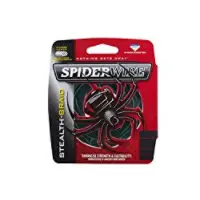
- Spiderwire Braided Stealth
-
Our rating - PE Microfiber Construction
- Price: See Here
Blood Knot
Slightly different than the knots we have gone over so far, the Blood Knot is used for tying two sections of line together. This knot works best with lines that are equal, or at least close to equal, size in diameter. The strength of this knot can be improved with the number of wraps you preform.
Step by Step Instructions for Tying the Blood Knot
- Line up the two pieces of line for at least several inches. Then wrap one piece of line around the other at least for 5 wraps. This is the step in which your knot gets the strength. If you choose, you can wrap the line a couple extra times to provide some extra security. Too many times and you may create a mess, 5-8 wraps are the recommended amounts. After performing your wraps, be sure to put your loose end in between the two lines.
- While securing your first set of wraps, pull the line you have not wrapped forward a bit. This is so that you can wrap that line around the first line the same amount of time. Essentially you are simply repeating the first step with the second piece of line.
- Now for the moment of truth, slowly pull both sides of your line. Both sets of wraps should start to gather together. After the knot has tightened, be sure to clip the loose ends.by
San Diego Jam Knot
The San Diego Jam Knot has been around for ages, although it hasn’t had very much exposure. This knot was developed by tuna fisherman, this knot is reliable and can be tied rather quickly. The San Diego Jam Knot can be used for any type of line, you can test the strength of your knot as well. Simply secure your hook or lure to something after the knot has been tied. Pull hard and steady on the line, if the knot holds your good to start fishing.
Step by Step Instructions for Tying the San Diego Jam Knot
- First thread the end of the line through the eye of your hook or lure. If your using a lure, leave it hang at the end of the loop. For a hook, hold it between your index finger and thumb.
- Use your finger to create a partial loop, then begin wrapping the loose end around itself and the standing line. You will need to make at least 7 wraps to get good strength.
- Take the loose end and run it back to the loop so you can feed it through the loop. Once you have fed the line into the loop, be sure to wet the line, as this will prevent the line from obtaining weak spots. Pull the loose end of the line slightly, now pull both the loose and the standing line at the same time. The wraps in the line will tighten and become coiled. Clip any extra line from the loose end.
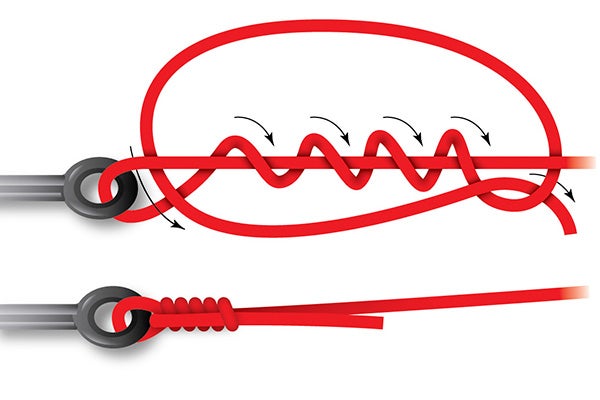
Uni Snell Knot
This type of knot has gained serious popularity in the last few years with the bass fishing community. With the Uni Snell Knot the hook is actually kicked out at an angle, this is perfect for hook exposure in the thick weeds.
Step by Step Instructions for Tying the Uni Snell Knot
- You will need to hold the shank of your hook so that the point of your hook is facing upwards. Run your line through the eyelet of your hook, continue to run the line down the shank of the hook, you will need to form a loop with your line.
- Once your loop is formed, use the loose end to form coils, by wrapping the looses end of the line around the standing line and the shank of the hook. You will want to do this 4 to 6 times, try to keep these coils as close together as possible.
- Now it is time to tighten your knot while doing this step, you will need to work your coils up the line until they sit just under the eyelet of the hook. Once you have done this, you can pull both the loose end and standing line at the same time. This will tighten your coils and secure your knot into place.
Rapala Knot
This knot was made popular by the Rapala company as a way to secure their lures to anglers line. The Rapala Knot is a loop system that will provide more action to those topwater baits, meaning they will move side to side more, enticing fish to gobble them up.
Step by Step Instructions for Tying the Rapala Knot
- Start by tying a loose overhand knot, then feed the loose end through the eyelet of your lure. Be careful that you don’t pull your overhand knot through the eyelet as well. Now thread your loose end back through your overhand knot.
- Once through the overhand knot, make 3 turns around your standing line. When this is finished, you will want to run your loose end back through your overhand knot again. This will form a loop, put the loose end through that loop.
- After you have wet your line, hold the loose end while pulling on the standing line, this will close your knot. Once the knot is closed, you should pull on both the standing line and the loose end to snug the not a little more. After this step you will need to cut the extra line from the knot.
Great Lures from Rapala
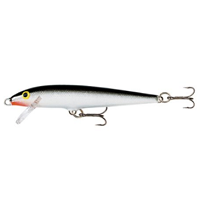
- Rapala 09 Original Floater
-
Our rating - Topwater or 11 feet
- Price: See Here
- Rapala Saltwater Skitter
-
Our rating - Super sharpe VMC Hooks
- Price: See Here
- Rapala Scatter Rap Crank
-
Our rating - Erratic Swimming Action
- Price: See Here
Arbor Knot
One form of knot when it comes to preparing your pole that is a necessity for any angler to learn is one that secures your line to your reel.Not tying your line to your reel will allow fish to run away with all your line. The Arbor Knot is good for tying line to a reel as well as tying off your filler spools. Tying off your filler spool will eliminate the need for notches in the spool or taping the line together.
Step by Step Instructions for Tying the Arbor Knot
- Start by wrapping the line around the reel once, then make a loose overhand knot. You will also need to tie an additional loose overhand knot into the loose end of the line. This second knot shouldn’t include the standing line, it should be a knot in the loose portion of the line only.
- Now you can pull your first knot tight while sliding it down toward your reel. Continue to pull until the second-knot “jams” against the first knot. Once both knots are tight, you may clip the extra line from the loose end.
How to Tie the Arbor Knot on a Filler Spool
- First find the loose end of the line on the spool. Use a finger on your opposite hand, run it under the line on the spool all the way around until you reach the loose end again.
- Now put the loose end under the line. Next you will want to tie an overhand knot, be sure you are trying this around the main line. Pull your knot tight. Now you can hold the loose end while rotating the spool. If you are turning the spool the correct direction, your knot will slide right down, while your line becomes snug.
Double Uni Knot
The Double Uni Knot is used to join two pieces of line together, these two sections of line can be similar or different in strength. Some anglers find the Double Uni Knot easier to tie than the Blood Knot, which is why this knot has become more popular.
Step by Step Instructions for Tying the Double Uni Knot
- The first thing you need to know is the number of wraps will depend on the two line types. Here is a good rule of thumb to follow. If you are tying mono line to braided line your going to want to make 5 wraps with the mono line, while making 8 wraps with the braided line. For use with two sections of mono line, you would do 3-4 wraps with each section.
- Our first step is to overlap the ends of the line to be connected. Now take the end of the line on the left, double back over the line and wrap both lines at least 4 times. Now you will want to take your loose end and slide it into the loop you have just created. Pull the loose end to tighten the knot.
- Now you will want to repeat that same process with the right side of the line. Keep in mind your rule of thumb for how many wraps you need to make.
- Now that both knots are complete, pull the standing line opposite ways to bring the two knots together. As always clip your excess string from both loose ends.
Berkley Braid Knot
The Berkley Braid Knot is best for tying your tackle onto your “superline” such as spiderwire or fireline. These type of line are said to be more slippery than average fishing line, therefore needing specially designed knots. The Berkley Braid Knot is relatively tied the same as the San Diego Jam Knot, with the exception that the Berkley Braid Knot is a double tie. This is said to give this a little more security.
Step by Step Instructions for Tying the Berkley Braid Knot
- You will need to double your braided line, and then put the loop through the eyelet of your tackle.
- Double back to the loose end and standing line. This will give you four pieces of line. Pinch these pieces of line together.
- Using the loop end of the line you will create 8 wraps around all four pieces of line. Working your way back toward the eyelet of your tackle. After the eighth wrap, make an opening behind the eyelet to slide your loop through the sections of line. Now you can tighten your knot by using even pressure pulling on both the standing line and the loop at the same time.
Recommended Items
- Berkley Fireline Fused
-
Our rating - Ultimate Sensitivity
- Price: See Here
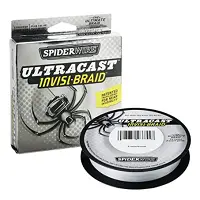
- Spiderwire Ultracast Invisi-Braid
-
Our rating - Ultra Translucency
- Price: See Here
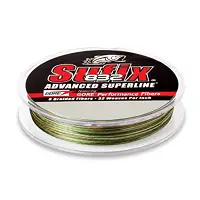
- Sufix 832 Advanced
-
Our rating - Ultimate abrasion resistance
- Price: See Here
Bobber Stop Knot
If you use a sliding bobber you will want to learn how to tie the Bobber Stop Knot. This allows you to fish at the depth that you prefer, as the knot causes the bobber to stop. Therefore not allowing anymore line through the bobber. If you fish with children, you will be glad to know that this knot will safely travel through the eyes on their fishing pole, and can be casted back out. No need to remind them to stop when they get to the knot.
Step by Step Instructions for Tying a Bobber Stop Knot
- In order to properly tie this knot you will need at least six inches of line. Start by laying the stopper line against the fishing line at the point you wish for the bobber to stop. Double back with the stopper line, this will form a loop.
- Make 3-4 wraps around both lines, making sure you pass through the loop with each wrap. Pull both loose ends of the stopper line to secure your knot.
Surgeons Knot
The Surgeons Knot is used for joining two sections of equal or unequal diameter line. When this knot is tied correctly it offers 100% line strength. When tying this knot you can certainly make it a triple knot by wrapping the loop through the overhand knot a third time. This will give the knot added security, but will also cause the knot to be a bit more bulky.
Step by Step Instructions for Tying the Surgeons Knot
- Start by placing your line and the leader line on top of each other, be sure to overlap them for several inches.
- Form a loop with the overlapped sections, put the loose end of your line and the leader through the loop twice. (This is where you would make your third wrap for the Triple Surgeons Knot.)
- In order to properly secure this knot, while cinching the knot be sure you are pulling on all four end pieces to this knot. Not doing this part properly will result in a faulty knot.

There you go, the most affective and used methods of tying knots. We hope you land a big one our there. With these knots, you need not worry about losing that fish before you pull it in so you can finally get that photo of that one giant fish that always gets away and perhaps dinner afterward. Good luck out there.
Sources
1. Berkley-fishing.com, Top 5 Must Know-Knots
2. Fishing.boyslife.org, 8 Fishing Knots to Know
3. Netknots.com, Beginner Fishing Knots
4. Scout.com, 15 Fishing Knots Every Angler Should Know
5. Zebco.com, Advanced Tips, Basic Fishing Knots