


How to Clean Fish: The Complete Guide
 How to Clean Fish: The Complete Guide
thegearhunt.com
How to Clean Fish: The Complete Guide
thegearhunt.com
When you plan your fishing trip, do you think about what your intentions are for those fish after you catch them? For example, some fishermen are into the sport solely for the thrill of catching the fish. So those fishermen will safely release their prize back into the water from which it came.Others will want to reap their rewards by keeping the fish for a meal to share with their family and friends. After all, fishing can be hard, but can also provide a very rewarding experience. If you intend to keep these fish there are some steps you will need to follow in order to preserve the fish.
Knowing how to keep your fish fresh is part of the process, whether you fish from a boat or the shore there are a couple of ways to do this. Some boats will have what is called a live well. This is an area of the boat that will allow your fish to swim around in the water while you continue fishing. The live well should be filled with the water from the lake or river you are fishing on.
If your boat doesn’t have a live well or your fishing from shore the next two options will work just as well as the first. Fill a cooler with some of the water from the lake or river you are fishing. Be sure to add some ice to the cooler, this will help regulate the water temperature for you.
The last option is to use a stringer, this is a rope or chain that will pass through the gills of the fish and out its mouth. The stringer will allow you to keep the fish submerged in water while preventing them from swimming too far away. To use this method effectively, make sure that you tie one end to something stationary, this will ensure the fact that your catch can’t just swim off.
Whether you’re a beginner, or someone looking for a different way to clean fish, this guide will walk you through the process. Knowing what to do from the time you catch your fish until it’s time to eat it, can make this sport that much more enjoyable.
Knowing Your Area
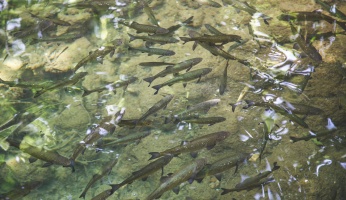
Knowing the water your fishing in can help you determine whether or not the fish you have caught can be consumed.Local residents are the best resource for checking the water conditions for the area your looking to fish. They will be able to tell you if the water has potentially dangerous bacteria in the plant life, or if the water has high levels of pollution. For those headed to new territory, make sure you know what the fish is before you decide to keep it. Some species of fish have toxic qualities to them, making them inedible. Doing your research ahead of time could potentially save you an unintended disaster in the long run.
Putting Your Fish Down for the Count
First let me start by saying, ending the life of your fish should be done in the quickest manner possible. This will prevent any damage to the nutritional value of the fish, due to added stress. It is also the most humane choice to this process, leaving your fish to suffocate out of the water is not the way to go. There are three options that are said to be the best for properly dispatching a fish. You can give the fish a good hit to the head, cut the spinal cord, or perform a technique called brain spiking.
Head Shots: This is the most popular method amongst the novice fishermen for ending the life of their fish. First, you will want to make sure that you always carry a mallet, this can be metal or wooden. Be sure to make your hit with a good amount of force, and to the top of the head of the fish. Keep in mind, the larger the fish the more force or blows it may take to put your fish down completely.
Cutting the Spinal Cord: A process like this is definitely not for the squeamish type, this process will involve actions that to some may be considered as unpleasant. In order to properly cut the spinal cord of the fish, you will first need to make an incision in the fish. This incision will need to be made between the gills of the fish, making sure to stay underneath them. The next step is to firmly snap the head of the fish backward, this will cut the spinal cord ending the life of the fish abruptly.
Spiking the Brain of the Fish: To make this method efficient, you will need knowledge of the anatomy of the fish species you have caught. The size and exact location of the brain of the fish will vary with the species of the fish. The action used for this method is a simple one, driving a sharp metal spike into the brain of the fish to end the life of the fish.
Once you have ended the life of your catch you must properly store this fish until it can be cleaned. Bacteria within the fish tend to grow rapidly once the life of the fish has ended. With any open wounds to the fish potentially putting your meal at risk for added bacteria. To reduce the growth rate of this bacteria, you will need to bring the body temperature of the fish. This step can be done by placing the fish into a mix of both water and ice. The colder you can keep the fish, without actually freezing it, the better the quality of the fish will be.
Cleaning Your Catch
In our home we have a rule that is followed when it comes to fishing, that is if you catch it you clean it. After all, this part of the sport really isn’t the best part, but it is a necessity for consuming or packing your fish.
Depending on the actual species of fish you catch, paired with your preferred cooking method, there can be a number of steps taken to properly care for your fish. The first step will be done no matter how you prepare your fish, this step is gutting the fish. Your next steps may include scaling and removing the gills your fish. The last step to the process will depend solely on how you choose to prepare your fish. Some species of fish are great prepared whole, while others are best suited as fillets or more steak-like cuts. In this section we will take a look at all of these steps, this will ensure that you have options for all ways to prepare your fish.
Methods Used for Scaling Fish

This step is not necessary to prepare all fish, take for instance the fact that you won’t be cooking or eating this fish with the skin on. In that case, you will fillet the fish right off the skin, saving you from the messy task of scaling. In the event you can’t skip this step, scaling is best suited as an outdoor activity. If you’re forced to do this inside, in order to save you some mess, you can do this while your fish is underwater. That will certainly help prevent the scale from flying all over, therefore making your cleanup a little easier.
With advances in fishing equipment scaling has become easier, electric and tumbler style scalers are known for making the scaling process quicker. For those not ready to make the cost plunge for such equipment, there are manual handheld scalers on the market. If you want to scale those fish in a more traditional fashion, the old timers will tell you to use the backside of your knife. When teaching children to scale fish, you can do as we did with ours, we taught them to flip a spoon over to use the edge to remove the scale.
The scaling step can be done either before or after the gut step, although scaling the fish before gutting is slightly easier. What makes it easier is the fact that the fish is more firm, because it is still intact. All you need to do for this step, start at the tail, make long strokes toward the head end of the fish, with your spoon, knife or scale. The faster the stroke, the more scales removed, if using a knife be mindful to not cut yourself. To check that the scales are completely removed, simply run your hand from tail to head, you will feel the scales that were left behind. Be sure to rinse the fish after scaling, this will eliminate any loose scales.
- Directions for Removing the Gills and Gutting Your Fish
First, lay your fish flat on a cutting board, position the fish so that the underside of the fish can be accessed. Using the tip of your knife, create an opening in the underside of the fish. This opening should start just above the tail of the fish and run to the gills. Use caution when inserting the knife, a cut made too deep, will open up the stomach cavity of the fish. This could jeopardize the integrity of the meat. - After making your cut, spread the opening so that you can remove the innards of the fish. Be sure to remove the anus of your fish, this can be done by making notches around the anus, then removing it.
- In order to properly remove the gills, there is a membrane that will need to be cut first. Some say it is easier to cut the whole way around the gills to remove them.
- The kidney of the fish is located closest to the spine, you will want to remove that as well. The kidney can be removed by scraping it with a spoon. After you have removed the kidney, be sure to rinse your fish extremely well with cold water.
- At this point, you can choose to remove the head. Fish such as trout, are typically prepared with the head intact.
- The gut step in the process is finished at this point. Be sure to properly dispose of any waste from the fish. Clean and sanitize the area when all waste has been picked up.
Dangers of Fish Cleaning
- Keep in mind the knife you are using might be very sharp, make careful movements as not to cut yourself. Don’t be in a rush while cleaning your fish, this can cause unnecessary injuries.
- Use caution when handling your fish, some species of fish are known for having very pointed fins. If you have ever had one stuck in your hand while handling a fish, you will know that you don’t want that to happen again. If you haven’t experienced this, trust me when I tell you that you most definitely don’t want this to happen.
- Check into the fish you caught before deciding to keep them. Some species of fish are known to be full of bones, while others just plain have meat that is inedible.
- Putting your hands into the mouth of a fish is never a wise idea. Some have razor sharp teeth, so even though your fish might be dead, you can still cut yourself on those teeth.
Ways to Cut Your Fish for Cooking or Storing
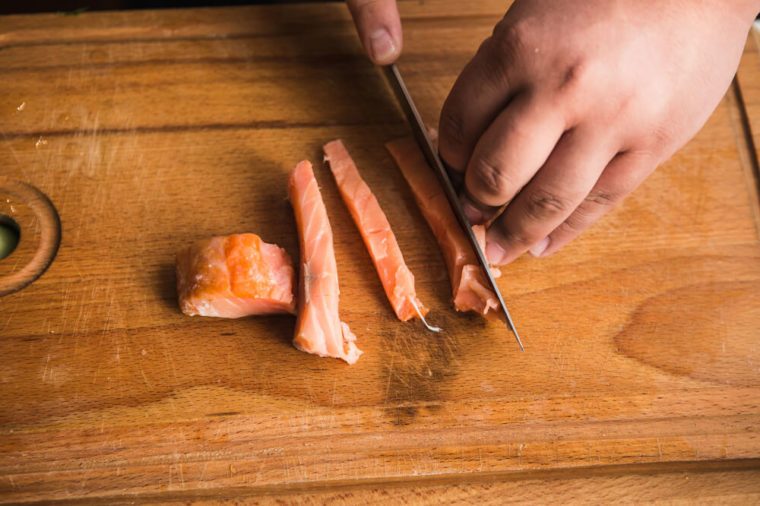
Filleting Fish: Filleting your fish can save you some time and effort during the cleaning stage. For panfish, such as perch or bluegill, there is no need to gut them. You will simply cut the meat from the frame of the body. Some fishermen prefer not to eat the skin of the fish at all, in that case, you would trim the meat from the skin as well. Removing the need to scale the fish as well.
If this is going to be your first attempt at filleting your fish, don’t be too upset if you don’t get all the meat from the bone. Practice makes perfect with this technique, most people who attempted this for the first time will tell you that it may turn out to look like a real hack job. Keep at it, the reward of the end product will be extremely satisfying when you finally master filleting your fish.
Directions for Filleting Your Fish
- The first method for filleting fish works best on smaller fish. These fish should be 5 pounds or less, such as perch, bluegill, or smaller walleye.
- Your first step will be to make a cut just past the head of the fish. You will want to do this right behind the gills.
- Next while holding the fish by the head down firmly, making sure that your free hand always stays behind the knife and the blade is pointed away from you. Make a slight turn with your knife, this will allow you to continue your cutting down in the direction of the tail.
- Now you will need to repeat this process in order to fillet the opposite side of your fish. Once both sides are finished, you can use your knife to remove any remnants of the rib cage.
- To remove the meat from the skin of your fish, make sure your fillet is skin side down on the cutting board. Using the tail end to hold, cut with an angle to get in between the meat and the skin all the way to the head end of the fillet. Note a little trick that my husband taught our boys about removing the skin of the fish. After starting the initial cut, continue cutting for roughly 2 inches, then remove the knife. Cut a slit in the exposed 2 inches of the skin, be sure to only make this slit long enough to fit your finger in. Now if you put a finger from your free hand into this slit, it will provide you with added stability for skinning your fish.
For a slightly larger in size fish, you will want to follow these directions for filleting. This one gives you a more open approach to filleting your fish, making it more comfortable for maneuvering.
- Start by cutting the fish just behind the head. Make sure this cut is at least half the way through the fish.
- Next, make a cut line a few inches along the top of the fish. At this point, you will want to use your knife to separate the ribcage of the fish from the meat.
- Continue working like this until you have freed the meat from the ribcage of the fish. Then flip the fish and start the process over again to work with the fillet on the opposite side.
- Once this is complete, you can cut along the rest of the backbone on both sides to free the meat from the bones entirely.
Cutting Your Fish Into Steaks
This style of preparing fish is normally used for larger species of fish. You will need a more sturdy knife than that of the fillet knife. In some instances, depending on the thickness of the backbone, a saw might be needed to cut through the bone portion. If you need to use the saw, freezing the fish first is best, to limit damage to the meat.
This process is extremely simple to perform, once you have your knife, simply lay your fish on its side. From here you will need to cut steak like chunks from your fish. Remember that it is easier to make these cuts using an angle of 90 degrees. There is one thing that you will need to watch for when using this type of preparation. Depending on the kind of fish you are processing, once you have cut through the backbone, watch for any possible fluid leaking. This fluid can ruin the taste of your fish, in the event that this happens, throw out that fish. At that point, you may want to consider filleting this fish instead.
Storing Your Fish

Although many fishermen will contest that eating fish fresh is the best way, you can do some things to store your fish. Fish can be stored in the fridge for up to 6 days without affecting the quality of the fish. In order for that to work, you need to be sure that any moisture is removed from the fish. Wrap the fish tightly with either tin foil or plastic wrap, be sure the wrapping is tight.
For longer shelf life you will need to prepare your fish to be frozen. For this vacuum sealing works best, but some have been known to first wrap the fish in freezer paper, then place them into freezer storage bags. This will greatly improve the storage time of your fish, giving you 3-4 months time for storage. Once thawed the fish should be cooked immediately and never refrozen.
Now that you have gone through this extensive set of instructions for the care of your fish, my hope is that with practice you can master these techniques. It can be such a rewarding experience to provide your family and friends with a fresh meal you worked so hard for.
Sources
- www.takemefishing.org, How to Clean a Fish
- www.fix.com, Hook To Cook
- www.themanual.com, Just in Time for Lent: How to Scale and Clean a Fish
- www.dummies.com, Filleting Your Fish
- www.takemefishing.org, How to Store Fish