


Leather Shoe Care: The Do’s & Don’ts
 Leather Shoe Care: The Do’s & Don’ts
thegearhunt.com
Leather Shoe Care: The Do’s & Don’ts
thegearhunt.com
Did you get a new pair of leather boots or shoes? If you want to get the most wear out of them, you will need to know how to take care of the leather.
It is easy to comprehend why people have been using leather for their clothes and shoes for thousands of years. It is decorative, functional, strong, flexible, and one of the most usable materials. That being said, it isn’t indestructible. If you are a fan of leather and have many things made from it, you will need to know a few things when it comes to taking care of it.
Breaking Them In
 Leather shoes and boots will need to be broken in before they are totally comfortable. Depending on the type of construction and the kind of leather used, the amount of time this will take can vary. There are many techniques to breaking them in, and they run the gamut from patently ridiculous to barely plausible. Here are a few that might work for you.
One tip that is popular is to fill new leather boots with water and let them remain that way overnight. Then, after dumping the water out in the morning, wear the boots with a couple of pairs of socks for a few hours. However, this will break them down more than it will break them in. The water can seep into those unprotected threads that are located in the insole seams. It will rot them. You will end up with mildew inside the boots and once that happens, you can’t get it out.
Another equally ridiculous method was told by a shoemaker who had been in the business for half a century. He claimed that farmers would fill their boots with dried, cracked corn before adding a bit of water. This would make the corn swell up and push the leather evenly in every direction to soften and stretch it. But, apparently, you had to be careful that they didn’t explode. Ha! 😊
Bearing that in mind, the bad news is that when it comes to leather and shoes or boots, there isn’t really a quick way to make them feel and fit like old ones. Breaking them in will take travel, time, and sometimes even a bit of pain as the leather and your feet work out some sort of compromise. However, you can make the process a bit easier.
The first thing is to find a pair that fits. When you come across a brand that fits you well, breaks in relatively easily, and give you good service, stay with that brand. Try on quite a few combinations of widths and lengths, and listen to the fitter. They can advise you on which ones will work for what you need them for. You might also want to try a different size on each foot. Feet can be of a different size and shape. Also, sizes vary from one manufacturer to the next.
Once you find a pair of boots and/or shoes you like, find out what type of leather they are made from. Oil tanned leather and leather that is chrome tanned are two different animals. They vary in their response to chemicals and dressing, water resistance, and in their strength. It only takes a minute to write or ask the maker about it before you begin wearing them.
Now, you are about ready to take them back home and get started breaking them in. One thing that can minimize your discomfort when it comes to breaking them in is to use an insole that has already been broken in. You can get these (new) insoles from stores that repair shoes, drugstores, etc. Keep a few pairs of insoles in a variety of your shoes and use them. You might even want to take them along when you are shopping for new boots or shoes to ensure that they will fit.
Waterproofing
 Before you set off in your new shoes, you should apply a wax or waterproofing solution to them. It is critical that you understand if they were made from oil tanned leather or chrome tanned leather. If the leather is oil tanned, it needs to be treated with oil. As far as price goes, the cheapest one you can find will more than likely be neat’s foot, while mink oil might be the most expensive. They can also be treated with a commercial coating that is oil based. If the leather is chrome tanned, wax would be the better option because oil will clog the pores.
For new shoes or boots, oil-based paste will be great for leather that is oil treated because it will not readily soak in and get the threads saturated. Leather that is chrome tanned needs to be sprayed with a silicone spray or maybe waxed with good quality shoe wax.
As far as leather boots go, many people are of the opinion that waterproofing them is unnecessary because they think it is done at the factory. Most of the time, this isn’t the case, and even if it is right, those boots probably spent months in storage and transit, and that can take a toll on any type of waterproofing aside from silicone. To be completely safe, go ahead and waterproof them yourself.
When you have your boots or shoes protected, you need to get your feet prepared. Put them on and walk around indoors with them (and no socks) on for a couple of hours. This will let you know where they might bind, rub, or pinch. You will need to reinforce those spots before taking off in them outdoors. You might use adhesive bandages or moleskin for this. The next step will be to put on two pairs of cotton socks. In new boots, you will want to stay away from socks made from synthetic materials and wool because they can slide around inside the boots. Keep the bottom laces loose, but make sure the top laces are tight so that you will be able to avoid any chafing on your ankles.
Now you are ready to walk in them. Try to stay away from rocky hillsides, steep slopes, tough terrain, etc. Terrain that is gradual and rolling is ideal. Make sure that every once in a while, you check on the laces. Your feet might swell, and this can cause the laces to feel tighter, so loosen them as needed. Stop every so often and rest your feet. Look at them while you are at it. If you have any places that might be forming blisters, patch them up, and treat any broken skin as soon as possible.
Try spending as much time wearing and walking in new boots as your feet will let you. The process of breaking them in can be one that is slow, but it can be much easier to wear them every day for a week as opposed to one time a week for a month. The leather in the boots will remember the way in which it is supposed to stretch.
If, by chance, you have purchased boots or shoes that are too small for your feet, you might consider stretching them using a shoe tree. It might be a better option to locate a shoemaker who can do this though, because they will not be as likely to split the seams by using a stretcher that is too large.
Most of the stretching products on the market are ones that are alcohol based, and while this will allow for the leather to stretch, it can also hasten the breaking down process. You can find products of this nature being sold in small aerosol cans, and they might be a bit expensive and difficult to apply inside the shoes, where they are most needed.
There is a better option though. You can soak a ball of cotton in rubbing alcohol. Wring it out and then rub it on whatever part of the shoe you need stretched. Don’t soak the inside of the shoe or boot though. Put on two pairs of socks made from cotton, and then put the shoes on and wear them for a minimum of an hour. This isn’t necessarily great for the shoes, but it can assist in solving issues for those who may have feet that are shaped oddly.
Leather Lather
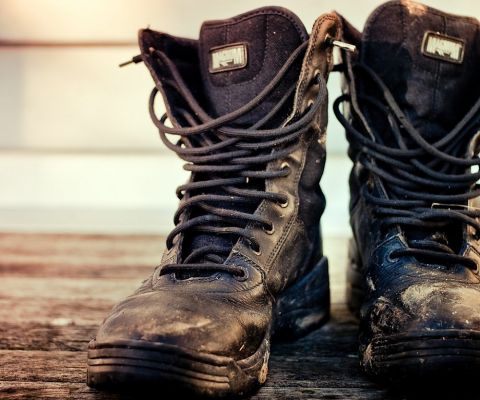
 When it comes to basket case leather boots – those that may have been repeatedly soaked, dried with heat, allowed to dry while mud is caked on them, used near or in salt water, etc. – before you coat them with anything, you should clean them with saddle soap. Even if you happen to be able to get all of the visible stains and dirt out with water alone, the deep dirt will still be there. Saddle soap can get that dirt out of there while also massaging and softening the leather. This will make it less likely to crack since it will be more pliable.
Saddle soap is something that is often misunderstood. It happens to be an actual soap that is capable of getting rid of dirt and grease, while allowing the water to rinse them out. However, it is an oil based product, so you don’t really need to rinse it out of anything that is made from leather. In fact, when it comes to leather products, saddle soap is a conditioner.
Back to the basket case boots. The first step is to brush them using a stiff brush. This will get rid of any crud that is caked on them. Next, they will need to be washed with plain water to get rid of any dirt left on their surface. Next comes the saddle soap. This is a product that should be used sparingly. It will require a bit of effort on your part to get it to lather up, but you will need a good lather. The ideal way to do this is to use a wrung out yet wet sponge with a small amount of the soap on it. Rub that sponge in a bowl until you have worked up a rich lather. Use the water sparingly. Get more of the saddle soap as it is needed, but only a small bit at a time.
Once you have gotten the bowl filled with the lather, add a bit more water, and then start working it into the leather of the boots using a circular motion. You can do this either with a brush that has soft bristles or with the sponge. If the boots are really dirty, you might notice that the soap turns brown. Wipe this off. You might need to go over the boots a couple of times before the lather remains white. Once the lather is free from dirt, wipe it all off and let the boots dry. When they have dried completely, you will be able to waterproof them.
Repair
 A great pair of shoes or boots that are made from leather should last you for many years. Minor damage, such as cracked soles, stitches that are pulled, missing or broken eyelets, and the like, are not a good reason to go out and buy new ones. Some of this damage you will be able to fix on your own. Resewing seams that are rotted or loose using a pair of needles and an awl is really quite simple.
If you do decide to sew the shoes, sew every one of the seams. Seams that are on the moccasin toes, collars, heels, and uppers can be easy to sew. Use a cotton – poly or waxed linen thread. You can find these at leather stores. However, don’t try to repair things like torn or broken welts. They need to be fixed by a professional. The same holds true for soles that are cracked.
When it comes to eyelets that are broken, you can punch them out and then replace them using an eyelet tool used by leatherworkers. A shoe repair person will be better able to do this though. Check each of your eyelets carefully. They have a tendency to develop sharp edges and pull. This can increase the failure rate of your shoelaces.
Linings that are rotted or torn can be difficult to get repaired or replaced at a cost that is reasonable. If your lining happens to be coming out in pieces, your shoes or boots are done. For this reason, you always need to ensure that the insides of them are always as dry as possible.
Boots and/or shoes made from leather can last you many years if you take care of them properly. It is well worth the time and effort to do so.
Sources
- Youtube, Shoe Care: Caring for Your Leather Shoes
- Popular Mechanics, How to Make Your Leather Shoes Last Forever
- Leather Milk, How to Care for Leather Shoes
- Luxury Insider, Guide: How to Care for Leather Shoes