


The 9 Fishing Knots You Should Know How to Tie
 The 9 Fishing Knots You Should Know How to Tie
thegearhunt.com
The 9 Fishing Knots You Should Know How to Tie
thegearhunt.com
Tying fishing knots is a fishing skill that is both important and essential. The knot is an important link between the fish and you. If you want to fish successfully, you need to know how to properly tie knots. You also need to have the knowledge regarding which knot to use and when to use it. To that end, here is a look at how to tie some of the most common ones.
Arbor Knot
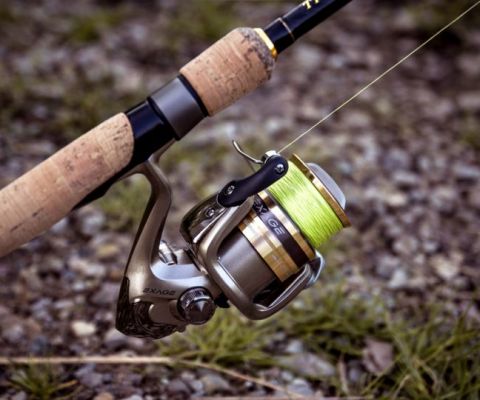
 This is a simple knot that you will use to tie the fishing line to your spool of any sort of fishing reel, whether it is a bait cast reel, a spinning reel, or a fly reel. The goal isn’t to think that the knot will hold when a fish takes all of your line down to the spool of the reel, but instead, to have something that will be strong enough to hold tight if you lose your rod and reel overboard and need to pull it up by pulling in your line. There is another knot that can be used when you want to tie your line to your reel – the Uni Knot – but with just a couple of wraps as opposed to the several you would use to tie your hook on.
Instructions:
Wrap the line around your arbor on the spool using the tag end of your line. Then just use a simple overhand knot right around the part that is standing using the tag end.
Then you will tie a second overhand type of knot right in the tag end and just a couple of inches from your first overhand knot.
Now, pull the part of the line that is standing in order to slide your first overhand knot right down to your spool and then jam the second one right up against the first. Trim your tag end close.
Double Uni Knot
This is a knot that is used by anglers for both fresh and salt water fishing. It joins two lines that have either different or similar strengths. This knot works well, and some people think that it is easier to tie than the more complicated blood knot. When you are tying braided line to one that is a monofilament, you will make a total of 8 turns with the more slippery braided line while making only 5 turns with the monofilament. This knot falls into the category of the 12 greatest fishing knots.
Instructions:
Take your lines that you need to join and overlap their ends. Use the end of the line that is on the left and double back to make 3 or 4 wraps around both of the lines and then through the loop that you just formed. Pull on the tag end in order to tighten it.
Repeat this process using the end of the line that is on your left to make the same number of wraps, unless you happen to be tying it with line that is braided, in which case you will need to double that number.
Now you have tied two of the Uni knots. Pull your standing lines in opposite directions in order to slide these two knots together.
Clip your ends next to the knot.
Improved Clinch Knot
 This knot is one that is time tested and quite a popular choice when it comes to tying your terminal tackle to a monofilament line. This knot is both easy and quick to tie as well as being reliable. That being said, it can be challenging to tie using lines that are larger than 25 pounds in strength. It isn’t recommended at all if you are using line that is braided. This is another of the 12 greatest fishing knots.
Instructions:
Thread the end of your line through the eye of your hook. Double back with it and make 5 or more turns right around the standing line.
Next, bring the end of your line back right through the very first loop that was formed behind the eye of the hook and then right through the larger loop.
Now you will need to wet the knot and then pull on your tag end in order to tighten the coils down. Slide it tight right up against the eye of the hook and then clip the tag end close to it.
Palomar Knot
This particular knot comes very close to being a 100% knot when you tie it properly. Make sure that when your lure or hook passes through the loop that all of the parts of this knot cinch right together. You can find depictions of this knot on other sites that make it appear as if the loop portion of it will go right up against the bottom part of your lure or hook. However, if you tie it like that, it can fail. This knot is the best choice to use when you are fishing with braided line. This is another of the 12 greatest fishing knots.
Instructions:
Double ½ a foot of your line and then pass the end of your loop and then pass it right through the eye of your hook. Alternatively, if you are using a hook with a small eye, pass the end of the line right through the eye of the hook one time and then double back before passing the end of the line through the eye of the hook again from the opposite side, and leave about ½ foot of the doubled line on the outside of the eye of the hook.
Tie a very loose overhand type of knot making sure that your hook hangs from the bottom of it.
Hold the overhand knot between your forefinger and your thumb and then pass a loop of the line right over the hook. Slide the loop to right above the hook eye.
Pull on the standing line as well as the tag end in order to get the knot tight down right onto the eye. Then, just clip the tag end close.
Seaguar Knot
 This knot was introduced to North America by factory representatives from the make of fluorocarbon line – Seaguar. It is simple to tie and quite reliable and it joins leaders made from fluorocarbon to monofilament type line. If you examine it closely, you will see that this knot is actually tied in exactly the same way as a King Sling Knot. The only difference is that the loop of the King Sling Knot needs to be tied at the end of your line using a double line while the Seaguar knot is tied with a pair of lines. Despite that, the method of tying it is the same. This is another one of the 12 greatest fishing knots.
Instructions:
Make a loop in your line as well as in the leader and then hold these loops side by side. Take note here that the line that runs from the left is at the apex of both of these loops.
Insert your index finger right into the loops and then make a total of 3 twists going counter clockwise.
Hold the loops open before feeding the tag end of your line as well as the whole leader through this loop and follow your finger out of the loop.
Moisten your lines and then pull on all 4 of the ends in order to cinch the knot so that it resembles a figure 8. Pull alternately on the leader/line and the tag ends to tighten it.
Trim the tag ends that are near the knot.
Surgeon’s Knot
This knot holds pride of place as one of the easiest and best knots to tie when you want to join lines that are of both unequal and equal diameters. You can also use it to join lines that are made from different materials. This knot is basically just a pair of overhand knots that have the whole leader pulled through your knot each time. When you properly tie this knot, it will approach 100%-line strength. It will need to be tightened by you pulling on all 4 of the strands in order to properly seat it.
If you want to tie a Triple Surgeon’s Knot, you will need to make 3 wraps of the loop going through your overhand knot. While there is a bit of added security when you use this knot, it can get to be a bit bulky. The single Surgeon’s knot is one of the 12 greatest fishing knots.
Instructions:
Lay your leader and your line on top of each other and overlapping each other by a few inches.
Make a single loop.
Pass both your tag end as well as the entire leader through that loop twice.
This one is optional. Pass both your leader and the tag end through your loop an extra time if you want to turn the knot into a Triple Surgeon’s knot.
Moisten your knot before pulling all 4 of the ends tight.
Surgeon’s End Loop
 This knot is popular both because it is strong and because it is easy to tie. It consists of a pair of overhand knots made with double line and that is it. This makes a trustworthy, strong loop right at the end of your line. You can use it to attach Snell leaders that are store bought and pre-made, like Eagle Claw, right to your line simply by interlocking the loops. In order to do this, just insert the hook of the leader through the loop before passing that hook right through its own loop before tightening it.
If you want to make it a Triple Surgeon’s End Loop, all you have to do is to add an additional pass through your first overhand knot. This makes the knot more secure. This is one of the 12 greatest fishing knots.
Instructions:
Double the end of your line and then tie an overhand knot loosely.
Pass the end of your loop through the knot another time.
This one is optional. If you want to turn it into a Triple Surgeon’s End Loop, just pass the end of your loop right through the knot an additional time.
Take the tag end and the standing line and then pull on the loop to make the knot tight. Now, just clip your tag end close.
Uni Knot
This one also goes by the name of the Grinner Knot. It is a dependable and good knot for tying terminal tackle connections to monofilament line. Some people who fish find this knot easier to tie than the Improved Clinch Knot and just as dependable. This one is also one of the 12 greatest fishing knots.
Instructions:
Run your line through the eye of your hook and then double it back parallel to your standing line. Make a loop in it by laying your tag end over the line that you just doubled.
Make a total of 6 turns using your tag end right around the double line and then right through the loop.
Moisten your lines and then pull on the tag end in order to tighten up your turns.
Slide your knot down right to the eye, or if you want, you can leave a small loop.
Bobber Stopper Knot
 This knot will be tied on to your line right above your sliding fish bobber. Your knot will grip the line right at the point where you want your bobber to stop for the exact depth at which you want to fish. The good thing about this knot is that you will be able to reel it in past the eyes on your fishing rod when you are ready to cast and then when your bait settles at your desired depth, the bobber will slide up your line until it comes into contact with the stopper. This will allow for deep presentation of the bait while your cast isn’t impeded by your bobber. When you are making this knot, Dacron fly line back will work the best.
Instructions:
Your knot needs to be made with about 6 inches of the line, typically you will use the same diameter as your line, or you can use Dacron. Lay your stopper line right against your fishing line at your selected point and then double back in order to create a loop. Hold that loop right where the stopper line will cross over both the fishing line and itself.
Make 2 or 3 turns around both of these lines while passing through your loop every time.
Pull your ends in opposite directions in order to make the knot tight.
In Conclusion
When you are fishing, you will need to choose the right type of knot to use and tie it properly. Lubricate your knots either with saliva or with water before you tighten them. Draw your knots just as tight as you can. Trim your tag ends close to your knots.
Remember to go fishing as often as possible and take a kid with you! Enjoy and happy fishing!
Sources
- You Tube, How to Tie Fishing Knots (Part 1)
- Arkansas Stripers, Fishing Line Knots
- Fishing NC, Fishing Knots
- Wide Open Spaces, The Only 5 Fishing Knots You’ll Ever Need