


How to Properly Lace Running Shoes: A Complete Guide
 How to Properly Lace Running Shoes: A Complete Guide
thegearhunt.com
How to Properly Lace Running Shoes: A Complete Guide
thegearhunt.com
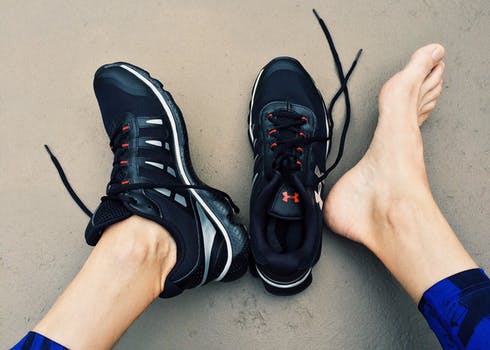
You might have noticed that on the top of every running shoe, there are additional holes for the laces right at the top, but nobody seems to use them. The thing is, when it comes to running shoes, how you lace them is quite important. Take these holes, for example. They are made so that you can loop your laces through them and tighten up the top as much as you can so that your feet won’t slide around inside them.
Today, we are going to talk about some of the different ways that you can lace your running shoes so that they will be the most supportive and comfortable.
Over-Under Lacing
The method of over-under lacing will reduce friction while also making the laces easier to tighten. It will also reduce the wear and tear. The laces will alternate between crossing over and under.
Lacing Techniques
 For eyelet pairs that are even, you will start straight across from the outside and then in through the eyelets on the bottom.
For eyelet pairs that are odd, you will start straight across from the inside and then out through the eyelets on the bottom.
At each of the eyelet pairs, you will need to alternate between crossing on the top and then in through the next set of the eyelets, or by crossing under and then out through the next set of them. Just repeat this process until the shoes are all laced up.
Some of the features of lacing running shoes in this fashion are that there is less wear and tear, it is fast and easy, and you get a decorative look.
Notes
When you alternate the crossovers from the inside and outside, there are a few benefits.
The laces do not rub against the edges of your shoes. This reduces the amount of wear and tear on both the laces and the shoes.
With the reduction in the amount of friction, you won’t need to pull each if the crossovers to tighten the laces. Instead, you will pull on every other crossover, making the process both easier and faster because the ones that run on the outsides are the easiest to get your fingers under.
Gap Lacing
This is a simple variation of the criss-cross style of lacing. It skips across over in order to make a gap right in the center of the lacing. This serves to both bypass an area that can be sensitive on your instep, and to increase the flexibility of the ankle.
Lacing Technique
 Start by going straight across in the inside and then out through your bottom eyelets. At each of the eyelet pairs, you will cross the ends and feed them under the sides and then out through the next set of the eyelets. Repeat this process until the ends of the laces are right below your sensitive area. Then, run the ends straight up the sides until they are at the next set of eyelets, skipping one set of eyelets to create the gap. Resume the lacing pattern up the shoe until you have laced all of the eyelets.
Variations
If you will be wearing these shoes for normal uses, you can skip one of the crossovers, with the verticals being on the outside.
If you want a fit that is just a bit tighter, skip one of the crossovers, but have the verticals on the inside.
For larger areas that are sensitive, or for a fit that is looser, skip two of the crossovers.
Some of the features of lacing your running shoes in this fashion are that it gives you ends that are approximately 15% longer, the look is messy, it allows for more flexibility, and relieves pressure.
Notes
That gap you created will provide relief from pressure in a couple of different ways:
- There won’t be any laces running across that area to press into your foot.
- There won’t be any crossovers that will hold down your shoes on either side of that gap. This allows for it to spread a bit wider right at that point.
Aside from providing relief from the pressure, the gap can alternatively be used to increase the flexibility of your ankle, specifically if you will be running in heavy, tall leather boots.
Also note that your gap doesn’t necessarily need to be right in the center of the lacing. You can position it where ever you need it.
Straight European Lacing
This is the traditional way of straight lacing that seems to be more commonly seen in Europe. With this one, your laces will run straight across right on the outside, but diagonally when they are inside. This method is also sometimes called Ladder Lacing.
Lacing Technique
 Start straight across the outside and then in through the eyelets on the bottom. If you have shoes that have an odd number of pairs of eyelets, just adjust it so that your left end is just a bit longer than the one on the right.
Your left end of the lace will cross diagonally on the inside and then straight across when it is on the outside. Your right end will cross diagonally from the inside but on an angle that is steeper, before going straight back across from the outside.
Alternate this pattern until you have finished lacing the shoe.
Some of the features of lacing your shoes this way are that you have ends that are approximately 3% shorter, it is messy underneath but neat on the top, and this method is also good for dress shoes.
Notes
This method might appear to be messy visually, but the zig zag on the bottom means that you get lacing that is quite tight and very secure. This mess will mainly be very noticeable on sneakers and shoes that have wide spaces between the eyelets.
This type of lacing is very suited to more dressy shoes – such as Oxfords. This is because it allows for the upper part of the shoes to come totally together right in the center while not corrugating or bunching. On shoes such as these, the zigzag underneath will be totally hidden.
Military/Sports Advice
As with other methods for straight lacing, this method offers an additional benefit when it comes to military or sporting use. The horizontal sections on the top can quickly be cut through by scissors or a knife so that the shoe can easily be removed from a sprained, broken, or otherwise injured foot or ankle.
Also, note that most military organizations tend to have regulations for everything under the sun, so check before lacing your boots this way.
Straight Bar Lacing
This is also known as Fashion Lacing or Lydiard Lacing. It is a variation of the Straight Lacing technique, but it gets rid of those underlying diagonals, which makes it look neater while also relieving the pressure on the top of your foot.
Lacing Technique
 Start by going straight across from the outside and then in through your bottom eyelets.
The left end should run straight up from the inside and then straight across from the outside.
Both ends should run straight up from the inside, with each one skipping one of the eyelets and then coming back up 2 eyelets farther up.
Both ends should then continue to run straight across from the outside before going in through their adjacent eyelets.
Finally, alternate running up from the inside and then across from the outside until you have finished lacing the shoes.
Some of the features of lacing your shoes this way are that the ends will be approximately 28% longer, and if you have an odd number of eyelet pairs, it will be messy. Even numbers of eyelet pairs will be neat, and it is quite comfortable.
Notes
Regarding the odd number of eyelet pairs: this configuration will only be neat on those pairs of shoes that have an even number of the eyelet pairs. This is due to the fact that the laces need to cross the shoe a number of times that is even in order for them to meet up in the middle to be joined together when you tie them.
When it comes to shoes that have an odd numbered set of eyelet pairs, you will need a workaround method in order for the ends to meet. The back and across workaround will more than likely be your best compromise when it comes to retaining the look while allowing for a regular knot.
Military/Sports Advice
Like other methods for straight lacing, this method offers an additional benefit when it comes to military or sports uses. The top horizontal sections of the laces can quickly be cut through with scissors or a knife when you need to remove a boot or shoe easily from a sprained, broken, or otherwise injured foot or ankle.
Also, note that most military organizations tend to have regulations for everything under the sun, so check before lacing your boots this way.
Hidden Knot Lacing
When you are able to hide your knot underneath, the result you get is a series of uninterrupted straight bars that will look quite distinctive both on running shoes and dress shoes.
Lacing Technique
 Start by going straight across from the outside and then in from the eyelets on the bottom. The left end should run straight up from the inside and then straight across from the outside.
Then you will take both ends straight up from the inside before skipping an eyelet and then reappear 2 eyelets further up. Both ends will then continue to go straight across from the outside before going back in from their adjacent eyelets.
You should alternate running up from the inside and then across from the outside until both ends meet in between the second eyelet from the top and the top eyelet. Tie your shoe at that point. You can use either the Reef Knot or the Standard Shoelace Knot.
Lastly, you will tuck your knot and ends into your shoes.
Some of the features with regards to lacing your shoes with this method include that the ends are approximately 28% longer, the discomfort is only slight, the knot can be a bit tricky to tie, but the look is one that is distinctive.
Notes
There can be a bit of discomfort that comes from the loose ends and knot being inside the shoe as opposed to outside. That discomfort can be reduced if you position your knot towards the outside of your foot.
If you will just be slipping those shoes off and on as opposed to untying and tying them each time, you can use Lace Anchors to permanently secure the shoelace ends instead of simply tying a knot in them.
This type of lacing will only work with shoes (neatly) that have an even number of pairs of the eyelets. This is due to the fact that the lace will need to cross over your shoe an even amount of times in order for the ends to meet before they are tied together. For shoes that feature an odd number of pairs of eyelets, the ends of the shoelace will end up diagonally across from each other right at the top of your shoe.
Military/Sports Advice
Like other methods for straight lacing, this method offers an additional benefit when it comes to military or sports uses. The top horizontal sections of the laces can quickly be cut through with scissors or a knife when you need to remove a boot or shoe easily from a sprained, broken, or otherwise injured foot or ankle.
Also, note that most military organizations tend to have regulations for everything under the sun, so check before lacing your boots this way.
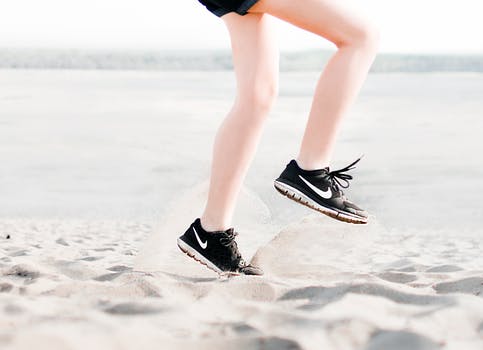
When it comes to things like running shoes, you will want your feet to be comfortable, but you also want them to not be sliding around in your shoes. This means that you will need to find a way of lacing them that is tight and won’t allow for slipping to happen. Experiment with a few methods until you find one that will be perfect for you.
Sources
- YouTube, How to Lace Your Running Shoes
- How to Run a Marathon, Tying Your Shoes
- Active, How to Lace Your Running Shoes
- Rogans Shoes, How to Properly Lace Running/Athletic Shoes