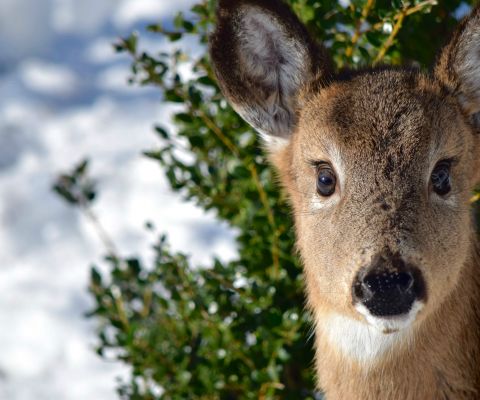


How to Clean & Field Dress Deer for Consumption
 How to Clean & Field Dress Deer for Consumption
thegearhunt.com
How to Clean & Field Dress Deer for Consumption
thegearhunt.com
(Disclaimer: This article contains graphic content & imagery)
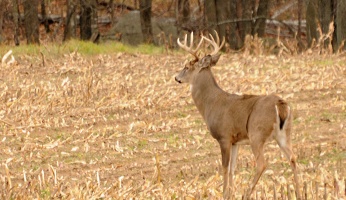
Cleaning your deer, more commonly known as field dressing, is a vital step to your hunting process. This is the step that allows you to preserve the integrity of the meat you have just secured. Removing the internal organs also relieves some of the added weight of the deer, making it easier for you to haul your prize out of the woods. Field dressing a deer can be a messy job, and some hunters will tell you that it is not their overall favorite part of hunting.
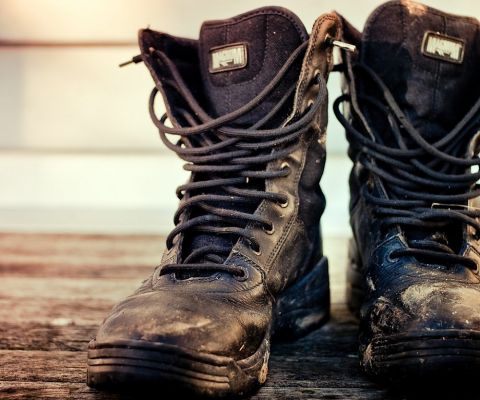
Having the right instruments on hand can save you some time and effort when field dressing a deer. Keeping a kit designed specifically for field dressing within your hunting bag is a great way to stay prepared. You can make this kit yourself, that way you will have the tools you prefer to use. Some examples of items to stock within your kit might be disposable gloves, large sealable bags, wipes for cleaning up, and most importantly a good sharp knife.
The knife you choose to use is totally up to you, it is best to find one that has a good grip to it. When field dressing a deer, there is a lot of blood involved, this can cause your knife to become slippery. A good handle grip can help combat the issues a slippery knife can cause. Every hunter has their own preferences when it comes to the blade of the knife.

Here are some factors to consider when determining what type of blade to use. A blade with a hook is handy for cutting just the skin layer of the deer away from the incision you make to remove the innards. Peeling back the skin slightly can prevent the fur from entering the inner cavity once you slice the deer open. A blade longer than 4 inches can cause you to accidentally slice into one or more of the internal organs. Opening up the internal organs can cause bacteria to spread into the meat. Some hunters like to use a blade that has a serrated section to the blade. The serrated section can be used to better open the chest cavity, this will aid in cooling the meat more efficiently. As you can see there are many options to sort through for blades, what works for one doesn’t always work for others.
Now that we have gone over a few of the essentials for field dressing a deer, this part of the guide will walk you through the steps for the messy part. Upon reading this guide you should have an understanding for the steps needed to properly field dress your deer. After all there really is no better way to learn than to dive right in and get hands on with the task.
Step by Step Instructions for Field Dressing a Deer

- The first step to the process is getting the deer into the correct position, make sure the deer is lying on its back with the back legs spread apart. Some people prefer that the head of the deer is uphill, when possible, this allows you some help from your old friend gravity.
- Next you will have to cut around the anus of the deer, this can be done by carefully making a core around the anus. Being careful to only insert the blade for 2 inches the first time around the core, next make another loop around the core you have created. Putting the blade in just slightly deeper, this will put the finishing touches on freeing up the colon. This step detaches the colon, so it will come out with the rest of the internal organs. Note: Use extreme caution while cutting the core around the anus, as not to puncture the colon. Puncturing the colon will cause you to ruin the meat of the deer. Some hunters will skip this portion all together as there is another method to removing the colon of the deer.
- If you have taken down a buck, you will need to remove the genitals in order to continue. The whole left behind will be the point of entry for your incision. If your prize was a doe, start your incision at the bottom most udder. This is where some opinions will differ, some hunters will make a shallow incision first, only deep enough to cut the skin. Then they will separate the skin, so that the fur will not get into the inner cavity. While others say that separating the skin is not necessary. To create your incision, keep your knife shallow and at a slight upward angle. Cut from your starting position all the way to the bottom portion of the ribcage.
- You have now successfully opened the bottom portion of the inner cavity. This is where you will remove the inner organs, at this point you can either remove the organs with your hand, or roll the deer onto its side to allow gravity to remove the organs. If you have already previously loosened the colon, you will now cut the internal organs loose and remove them all. If you decided not to loosen the colon first, you won’t be able to remove the large intestine in its entirety at this point. Simply move the large intestine to the side until later, you will remove that and the bladder at a later time. Note: Some hunters will cut the upper portion of the large intestine to get it out of the way. If you choose to do this, be very careful, you don’t want the inside contents of the intestine to contaminate your meat.
- At this point, the bottom of the inner cavity should be free of obstruction, giving you full view to the diaphragm. In order to remove the heart and lungs, you will need to take out the diaphragm. This can be achieved by running your blade along the inside part if the ribcage. That should expose the heart and lungs for you. There is quite a bit of debate on whether or not you should split the sternum of the deer. Some consider it a waste of time, stating that you should roll up your sleeves and dig in. While others prefer to split the sternum for better access to the heart, lungs, and windpipe. Splitting the sternum is also known for helping with cooling the meat more quickly. If you choose not to split the sternum, reach in and find the heart and lungs. You will need to cut them free, in order to free the lungs you will need cut the windpipe. Cutting the actual sternum bone is not recommended, instead you should cut on the side of the bone where the ribs meet the sternum. Once spread apart, you should have full access to the heart and lungs, cut any connective tissue including the windpipe.
- This step is for those who opted not to cut a core to loosen the colon. At the original place you started your incision, cut through the meat, stopping before the anus. Using a saw, cut through the pelvic bone, at this point you should have access to the bladder and the lower part of the large intestine. You can now carefully cut to remove these organs.
- Once this is finished, turn the deer incision side down, this will allow any residual blood to drain. Depending on where your hunting, you may need to cleanup your gut pile. At this point the deer can be removed from the woods. Remember to hang the deer once you reach your destination, but also rinse the deer with water from a hose. This will remove any debris from brining the deer out of the woods.
Now that you have finished the messiest part of the job,you have hung the deer up, and have it rinsed clean your onto the next step. This step is to skin the deer, some say this is best done within a couple of hours of the kill, as the body is still warm and the skin will separate easier. While others say that either way it makes no difference, the timing depends on the weather and your schedule. One thing that is agreed upon by many, skinning a deer is much easier while the deer is hanging.
Step by Step Directions for Skinning a Deer
- With your deer hanging, begin cutting around the joints in each leg with a sharp knife. Make additional cuts to inside part of the legs, joining the to the incision made for field dressing. Essentially you are getting the skin ready to come off in one large piece.
- Start trying to remove the skin from the back legs, pulling down on the skin, and using the blade of your knife at the same time to free the skin from the meat. If your deer is hanging from the neck, after cutting around the joints of the legs, you will need to cut the skin all the way around the neck as well. From there you will begin the pulling and freeing process.
- When you feel that you have enough skin peeled back for a secure grip, roll the skin fur side under. At this point you can pull down firmly on the hide. Continue to use your blade to free any skin that is stuck to the meat. For a deer hanging from the rear legs, it will take some blade work to remove the skin from the front shoulders and legs. Once you have the skin off the shoulders and legs you can use a saw to remove the head of the deer. That will take care of removing the hide as well. For a deer hanging from the neck, you will have to use your blade to remove the skin from the back legs. Making sure to cut around the bottom of the legs above the hooves, so the skin can be completely removed.
At this point you can bring your deer in for processing, or you could attempt quartering this kill on your own. This can seem like an impossible task for some, but a deer can be quartered by taking it apart at the joints. This makes it easy, plus all you need to assist you is a sharp knife. If anyone tells you that you will need a saw, they are wrong, saws create bone fragments which ruins the meat of the deer. With practice quartering a deer can become a quick and easy task.
Step by Step Directions for Quartering a Deer
- Now that you have removed the skin from your deer, you can start the quartering process by taking off the front legs at the joint. This joint is large and can be found by feel, once you have found the spot where the bones join, you can open that up with your knife. Cut around this joint, while at the same time you will need to twist the joint to free the leg.
- Once you have removed the front legs, you will move on to the shoulders. The front shoulders are very easy to remove, start out by cutting them from the underside. You won’t find any bones getting in your way, all you need to do is lift them while you are cutting, this will allow you to cut them completely free.
- Now that you have removed the shoulders, you can cut off the back straps of the deer. You can locate these on both sides of the backbone. Using the backbone of the deer for guidance, cut the deer from just above the hip right to the neck. This way you can also collect the meat from the neck at the same time. Once you cut the meat free from the neck, you can seperate the neck meat from the back strap by cutting it. Now you will want to cut across the back strap at the hip, in order to start the separation process. Once you have done this, start by separating the back strap from the bone with your knife. After only a couple of inches, you should be able to finish removing the back strap by just pulling. You will need to repeat this process to the opposing side of the deer.
- Just inside of the ribcage of the deer is where you will find the tenderloins. These are simple to remove, just cut the connective tissue on one end, then pull slightly on the meat. Cut away any tissue that give resistance while removing the tenderloin, then cut the connective tissue from the bottom portion. Repeat this process for the tenderloin on the other side of the ribcage as well.
- For cutting the hams off the bone, you will want a sharp knife, as this meat is thicker than that of the previous cuts. The ham is joined to the body by a joint that can be easily cut around to remove. Start by the inside portion of the pelvic bone, feel with your hand for the joint. Once you have found the joint, cut into the meat to expose that joint. This will give you a better view for cutting all the way around the joint. When you get around to the back of the deer follow the backbone for guidance. Once you reach the tailbone, you will follow the pelvic bone, by curving slightly inward while cutting. Once you are all the way around the joint on both hams, you are know ready to cut through the the joint to fully remove the ham. Use caution for this step if your deer is hanging from the hind legs, the weight shift from freeing one ham tends to send the opposite side swinging.
- Once you have both hams removed it is time to remove the back legs. This can be easily done by cutting around the knee to expose the joint and socket. Once that socket is exposed you can separate them using your knife to remove the leg. At this point you are finished quartering your deer, some people will go back to remove the meat from the ribs and other small areas. But let’s be honest there really isn’t much meat to be had in these areas, so you won’t be wasting anything.
Now that you have successfully quartered your deer, all that is left for you to do is to cut the meat from the bone. This is a simple task and can be done by trimming large sections from the bone at a time. Once all the meat is removed from the bone you can choose how to cut the steaks for consumption. Everyone likes their meat cut in different fashions, some may prefer more roasts to steaks, while others use the meat for making a hamburger.
Once you have done the field dressing, skinning, and quartering a deer a few different times, it will seem like a breeze taking you little time at all. The first step to the process is working up the nerve to attempt these things for the first time. It is my hope that after reading this guide, you gain that nerve, so that you can experience hunting in a more traditional fashion.
Sources
- www.hunter-ed.com, Field Dressing a Deer-Detailed Instructions
- www.qdma.com, How to Field-Dress a Deer
- www.realtree.com, How to Skin a Deer in 6 Steps
- www.bowhunting360.com, How- to: Field Dress a Deer in 10 Steps
- www.realtree.com, How to Quarter a Deer in 7 Steps