How to Build a Cat Tree Your Kitty Will Love
 How to Build a Cat Tree Your Kitty Will Love
thegearhunt.com
Building a cat tree for your furry friend will help to save your furniture while also giving the cat a few vantage points. Going out and buying these structures can be an expensive endeavor, but you can easily make one for your cat even if you don’t have a lot of DIY experience.
There are quite a few different designs for cat trees that you can find online just by searching for “DIY cat tree”, but if you go with your imagination, you will have no limits when it comes to what you can make. If you use materials such as wood off cuts, recycled items, or reclaimed furniture, they can even be quite cost effective. If you prefer a look that is more natural, you might even decide to use a tree branch as material.
Cats, specifically indoor cats, need somewhere to climb and scratch so that they have the ability to express their natural behavior. Cat trees are a great way to provide them with a perch that is nice and high, and if you do this project yourself, not only will it save you a bit of money, it will also allow you to make one that will fit both your amount of free space and your décor.
The first thing you will need to do is to get some idea of what kind of cat tree you want and what you have both the capabilities and tools to build.
Cat Tree Components
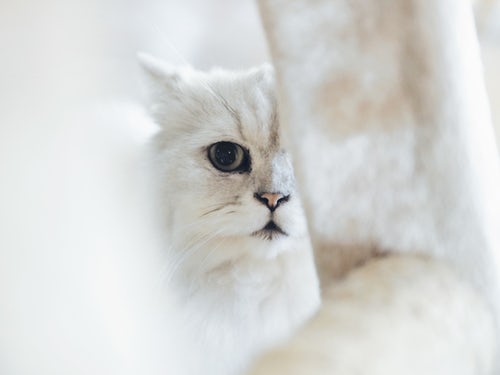 You can make a cat tree from things like thick cardboard tubes – like those found inside paper or carpet rolls, PVC pipes, thick wooden posts, or even natural tree branches. The most basic components will be a base that is both sturdy and thick, as well as a post of some sort made from carboard or particle board, or even wood that has been covered in sisal rope or carpet remnants. You might drill this post into place, or if the post is one that is hollow, you can use brackets.
Cats also enjoy having multiple levels. Some of them like little cubby houses on a platform, and maybe even a dangling toy or two to paw at. Your cat tree needs to be strong enough so that your pet will be able to climb it without the tree swaying or the animal will not go near it.
While you are still planning your cat tree design, you need to think about how you will make sure that it is kept clean. If you cover the surfaces with carpet, you can vacuum it, but you should try to stay away from materials that are porous because they will not be easy to clean. Any beds and/or cushions will need to be removeable so that you can wash them once a week using hot water. To keep these from slipping off your tree, you might consider using Velcro.
Finally, unless you will be using paints that are natural, don’t paint it. Paint and adhesives that have strong odors can upset the cat due to their delicate sense of smell.
What Do Cats Like?
Before you begin, you should take a minute to consider what objects your cat likes using for scratching. Cats who use door frames to scratch might enjoy a tree made from sisal rope or even natural wood. If you want to use sisal, which is rather rough, you should know that it can take quite a bit of time to wind it around the cat tree post and if you want to purchase it new, it won’t be as cost effective as other materials.
Cats who prefer carpets or the leather recliner might do better with a cat tree that has been covered with carpet. There is an added bonus to this. That is that when the carpet gets old or shredded, or if you just want a new look, it is easy to replace. Just try to avoid carpets that feature loops because cats can get their claws stuck in them.
Cats tend to love vantage points almost as much as they love hiding, so it will be worth it to consider using multiple levels and heights. If the cat can use the tree to escape the dogs or look out the windows, that is great.
Locating Materials
 Check with your city council website to find out if there are any recycling centers in the area where you might be able to get cost effective materials. For example, recycling centers may just have all of the major items you will need, such as pieces of wood, cardboard tubes, carpet remnants, and other various pieces.
You might also check online to find any other places that offer recycling options to see if they have materials. The base of this tree will be the most critical part to get right, so you will need a good material to make it from. It should be both heavy and thick so that it will be able to stabilize the rest of the structure.
Tools Needed
- Screws or nails
- Sandpaper
- Saw for cutting wood
- Utility knife for cutting carpet
- Rivet gun if you will be utilizing a hollow tube or PVC pipe for the tree
- Hammer and nails
- Drill
- Hot glue or staple gun
Basic Scratching Post
yyIf you are just in need of a simple scratching post, you will need to ensure that it will be tall enough so that your cat will be able to completely stretch himself out. Most of them are too short. Measure your cat from the tip of his nose all the way to the tip of his tail and then make it at least that tall. If your cat tends to scratch surfaces that are horizontal, make him a scratching post that is horizontal. This will make it easier to get him acclimated to the new scratching post/cat tree.
Tree Branches
You might just decide to use a large tree branch for the purposes of your cat tree. Before you do this, you need to ensure that there aren’t any pests residing in the wood. The last thing you want is creepy crawlies coming in to your home.
Permanent Post
If you don’t want to create an entire cat tree, you can make use of structures and furniture that are already inside your home. A length of rope or carpet covered board can easily be attached to a wall, or even right to the side of one of your bookcases. Platforms and shelves can always be screwed right in to the walls in order to make an entire series of platforms.
Using a Ladder to Build a Cat Tree
 If you want to make a simple cat tree by using a ladder, you will need to find one of the old wooden ones. Look around at places like antique stores, thrift furniture stores, and garage sales for one that is about 4 feet tall.
The best type will be one of the old-fashioned ones that appears as if it were an upside down “V”. It should have a few steps on each side that are at the same heights. It is fine if the wood appears to be old, but you should make sure that the actual foundation of the ladder is stable. You want to make sure that it won’t fall over and injure your pet. Also, make sure that it is about 4 feet tall. Taller ladders might be either too tall for the cat or less stable.
Get Your Supplies Together
This ladder will be the base of your cat tree, but you will need to change it up a bit in order to make it a bit more cat friendly. Here is what you will need:
- A Piece of plywood that is both wide and long enough to rest on two of the rungs on the ladder. This will be used to create a platform for the cat. If you want to make multiple platforms, you will need more plywood.
- 2” nails and a hammer
- Carpet
- A staple gun that is electric
- A piece of denim, canvas, or some other type of sturdy fabric that can be used to create a cat hammock between two of the rungs.
- Paint – optional
- Some sort of toy that hangs from a piece of string or rope
- A bit of sisal rope to wrap right around the ladder’s legs
Sand the Ladder and Paint it
 Using a fine grain sand paper, sand the ladder and make sure to get rid of any splinters and jagged edges. You will need to also do this with the plywood you will be using.
Paint the pieces of plywood and the ladder with one or two coats of paint if you have decided to paint it. It is important to make sure you let the paint dry completely. When it comes to the paint, use your imagination. You might decide just to paint it so that it will match the décor in the room where you will put it. However, you might just decide to paint it green and brown so that it will resemble a tree or get creative and stencil it with a variety of designs.
If you do decide to paint it, you won’t need to paint the plywood you will be using for the platforms. You can make these quite comfortable for your pet if you cover them with carpet. Just attach the carpet to the platforms after you have nailed them where they will go. You can attach the carpet to the platforms with the staple gun. Make sure that these staples don’t stick up. If they do, hammer them down flat.
Nail the Platforms to the Ladder
You should put the plywood platform so that it will be lined up across to of the rungs of the ladder at equal height. Use 4 nails and your hammer to nail it to the rungs, with one nail in each corner.
When you finish nailing the platform(s) down, make sure that they are secure. If you want a hold that is firmer, consider using more nails or even some wood screws.
If you will be using a second platform, use the same procedure on a different level of rungs.
Hang the Hammock
Cats tend to enjoy sleeping in these. If you want to add one to your custom tree, measure and cut the cloth you will be using so that its corners will stretch between the legs of the ladder. Staple or nail each corner of the fabric to the inside of each of the legs and be sure that all of the nails or staples are at the same height.
Make sure that the fabric you will be using for the hammock is of a thickness that will support the cat’s weight. You might consider doubling it or hemming its edges to make it even stronger. Fabric that will stretch a bit is perfect for a cat hammock. Ensure that the staples or nails don’t protrude so that your pet won’t be cut or scratched. Tap them down with a hammer if you need to.
Instead of making a hammock, you might want to use a concrete form tube that has been covered in carpet. If this is the case, fasten it to the ladder by first attaching it to a pair of 2 x 4s that you will then secure to the ladder between the legs using screws, nails, or bolts. This might make the cat tree not as portable, but it will add to the stability.
Wrap the Legs in Rope
If you want your tree to serve as a scratching post too, you can always wrap the bottoms of the legs with rope that is coarse and strong.
Cut your rope into 4 pieces. You can secure the end of your first rope to the inside base of the first leg using staples. Wrap that leg tightly with the rope and tap it down with the hammer to make the coils tight. Secure the other end of it with another staple, ensuring that it isn’t near anything the cat might scratch. Then, just repeat the process with the other legs.
If you prefer, you can always cover the entire leg(s) with this rope from the bottom to the top. Just use a new piece of rope between each of the rungs. This will give your pet access to scratching surfaces regardless of his position on the tree.
Finishing Up
Now it is time to hang that toy you bought right from the top of the ladder. It will need to be positioned so that your furry friend will be able to reach it, so that it will entice the creature to play.
If there are any other finishing touches you want to make, go ahead and do so. Now your cat has a lovely, unique cat tree.
Sources
- You Tube, Building a Custom Cat Tree
- How to do Things, Building Cat tree Furniture: Cat Tree Condo and Scratch Post
- DIY Repair Guide, How to Build a Cat Tree


